How to Use Burnpedia: a Step-by-Step Video Guide
Watch every screen, from a new free account to Pins scheduled on your calendar, then follow the same steps written out with screenshots.
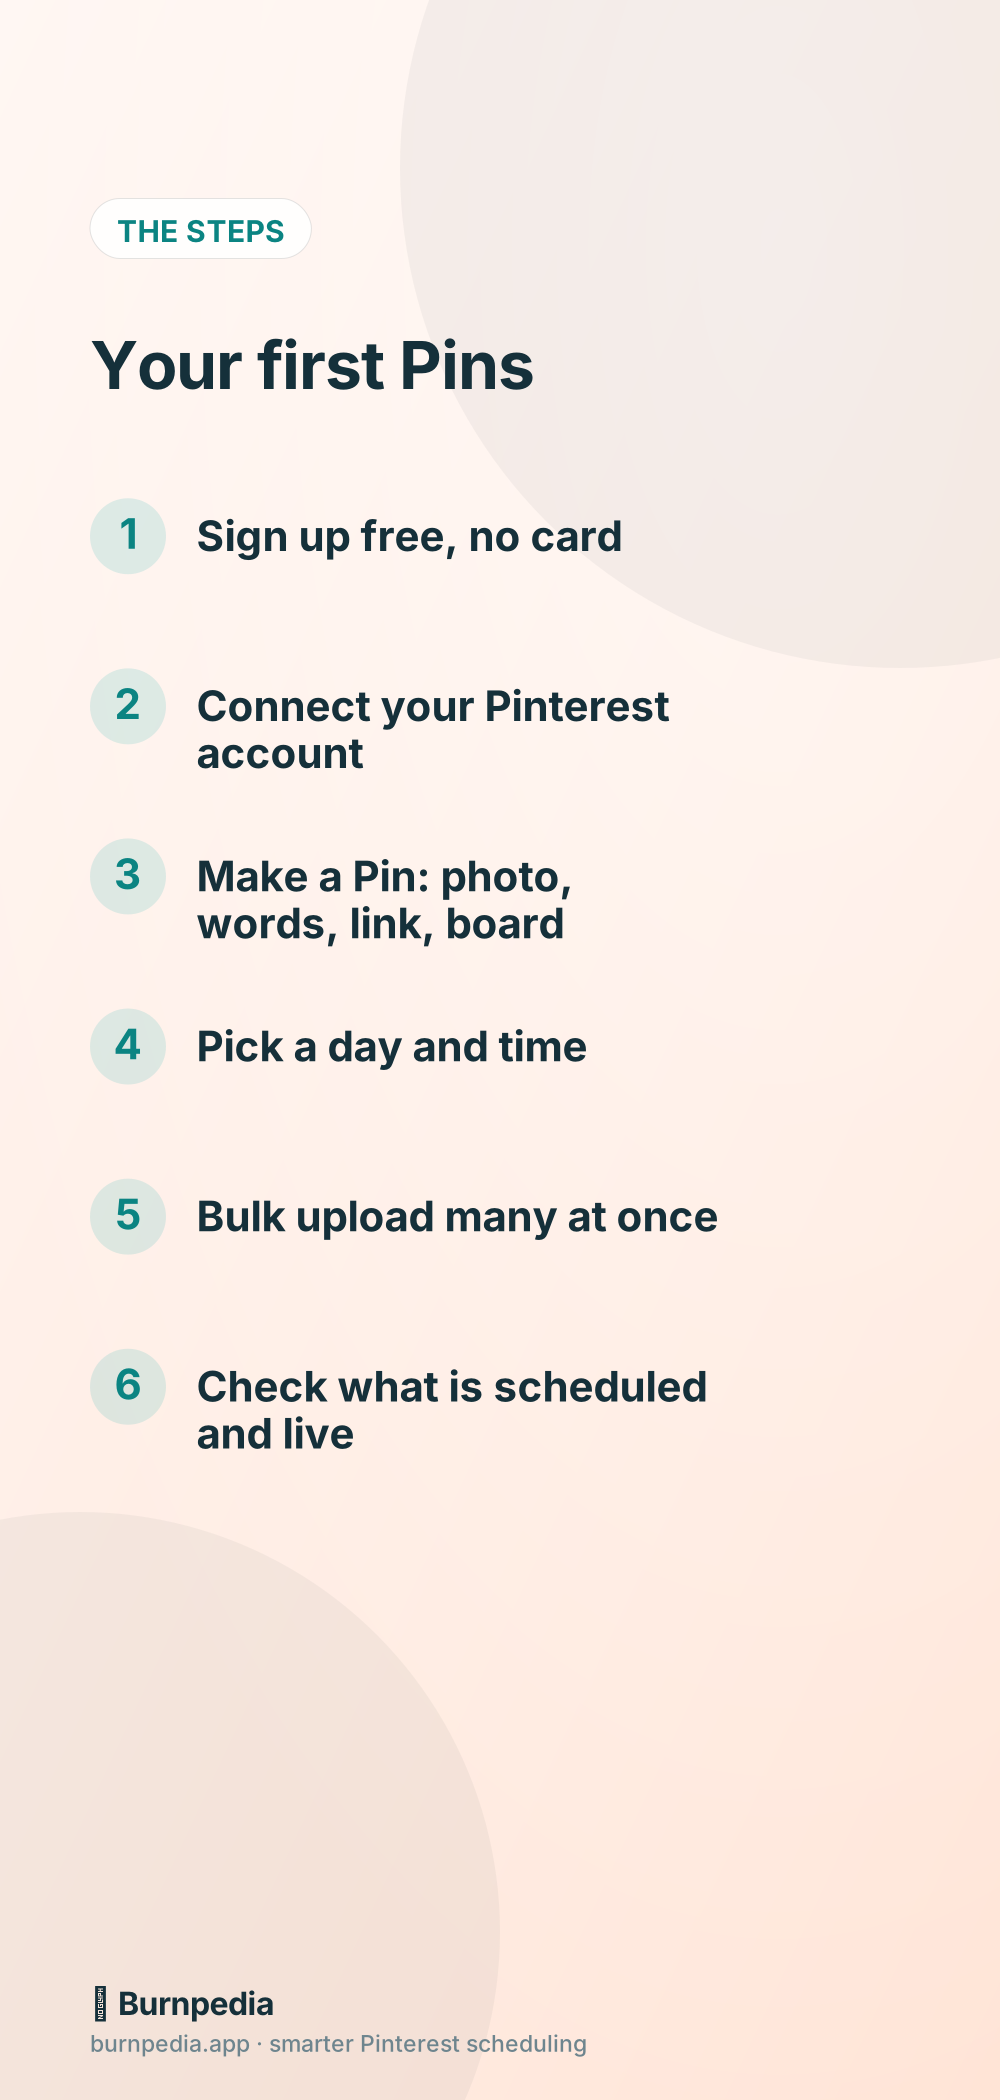
This guide shows every screen of Burnpedia in the order a new person meets them: a free account, your Pinterest account connected, your first Pin made and scheduled, many Pins at once, and where to see what went out. The film above has a voice and captions, and each chapter below has the same step written out, with a screenshot from the film.
Step 1: Sign up free
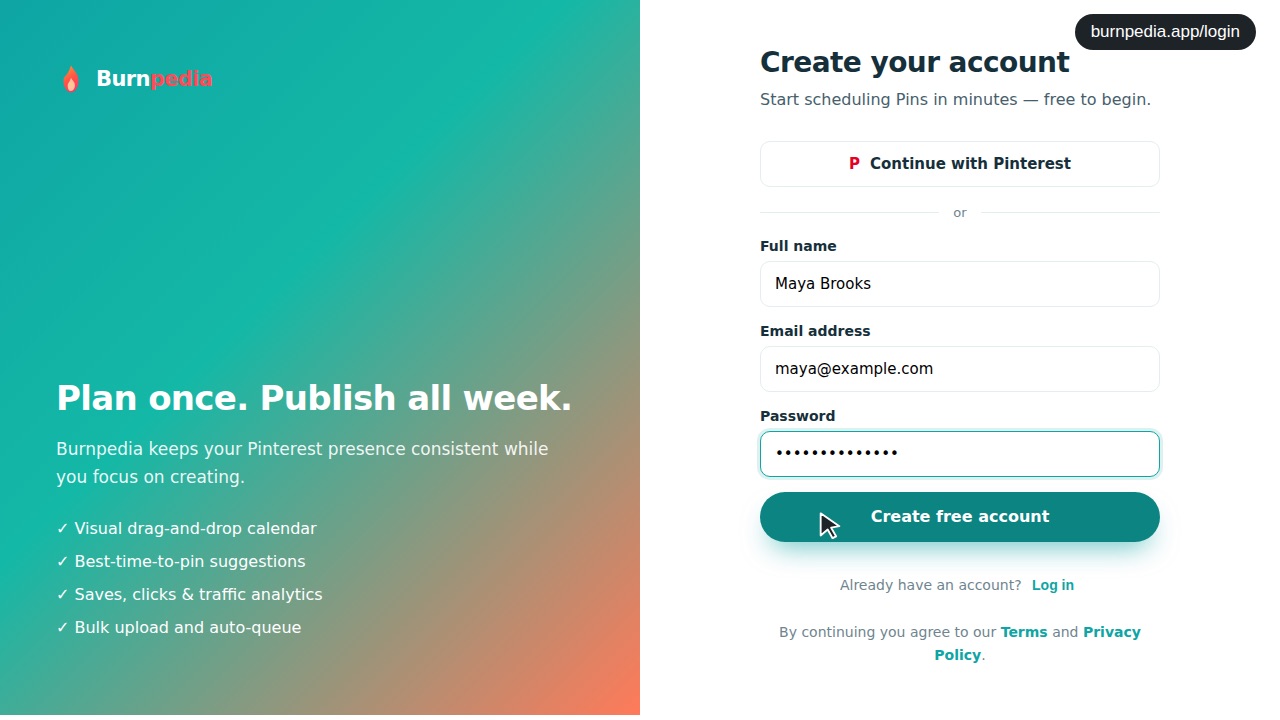
Go to the sign-up page, type your name, your email and a password, and press Create free account. The Starter plan is free, never expires and needs no card.
Step 2: Connect your Pinterest account
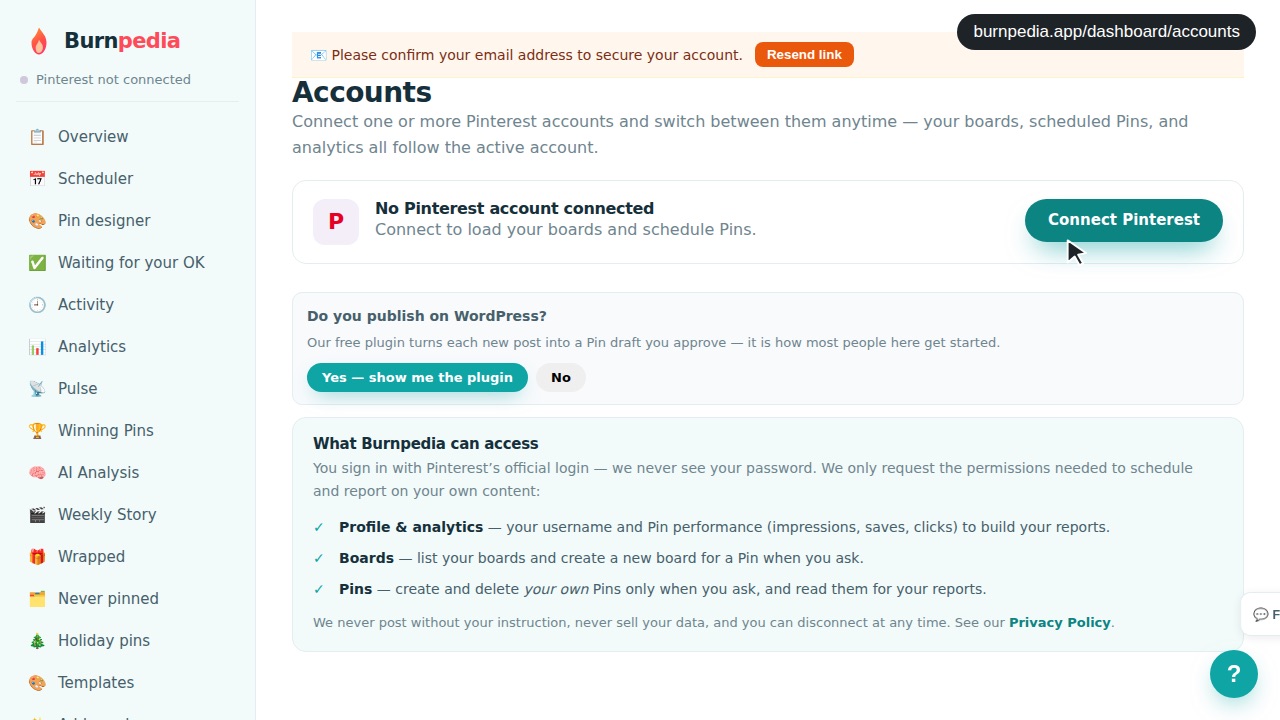
You land on Accounts. Press Connect Pinterest. The box under it lists what Burnpedia can see: your profile and Pin numbers for your reports, your boards, and your own Pins, only when you ask.
Pinterest then asks you to sign in on its own page and allow access, and brings you back. Burnpedia never sees your Pinterest password, and you can disconnect at any time. Back on Accounts, your account shows as Active.
Step 3: Make a Pin
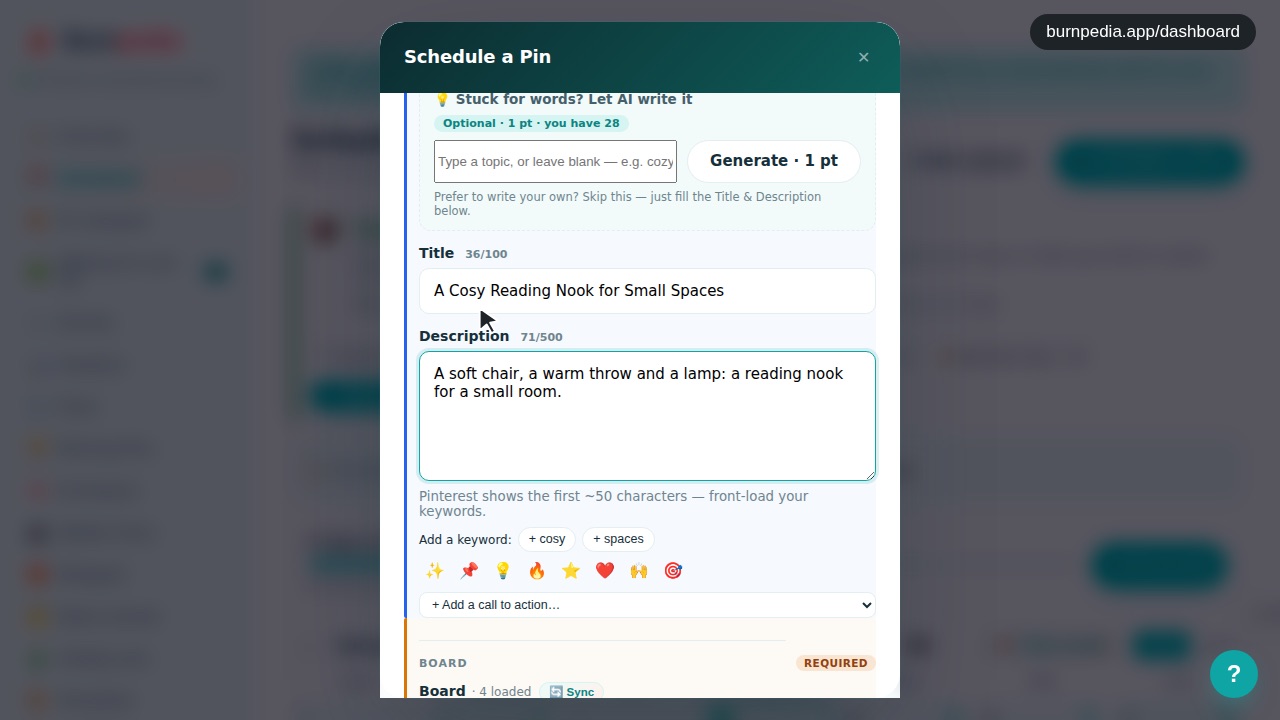
Open the Scheduler, your calendar, and press Schedule a Pin. Upload a photo from your computer, write a title and a description, and paste the link the Pin should open. Then pick one of your boards: they come straight from your Pinterest account.
No Pin picture yet? The free Pin designer, in the menu on the left, turns a photo into a Pin: pick a template and a colour, change the title, then add it to your queue or download it.
Step 4: Schedule it
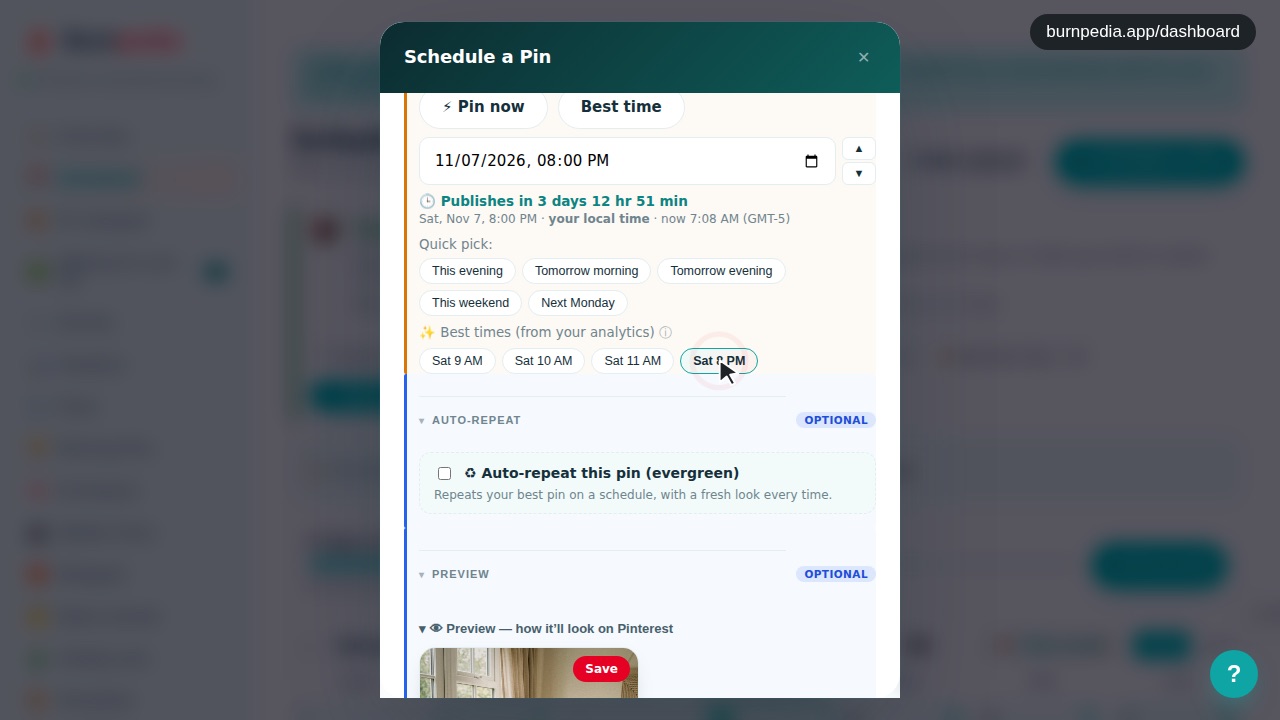
Under Date & time, choose a day and a time, or tap one of the best times it suggests. Until it has learned your audience, those start from the hours U.S. Pinterest users are most active; read more in the best time to post on Pinterest.
Press Schedule Pin and it sits on your calendar until its time; you do not have to be online. In a hurry, Pin now sends it to Pinterest within about a minute.
Step 5: Bulk upload many Pins at once
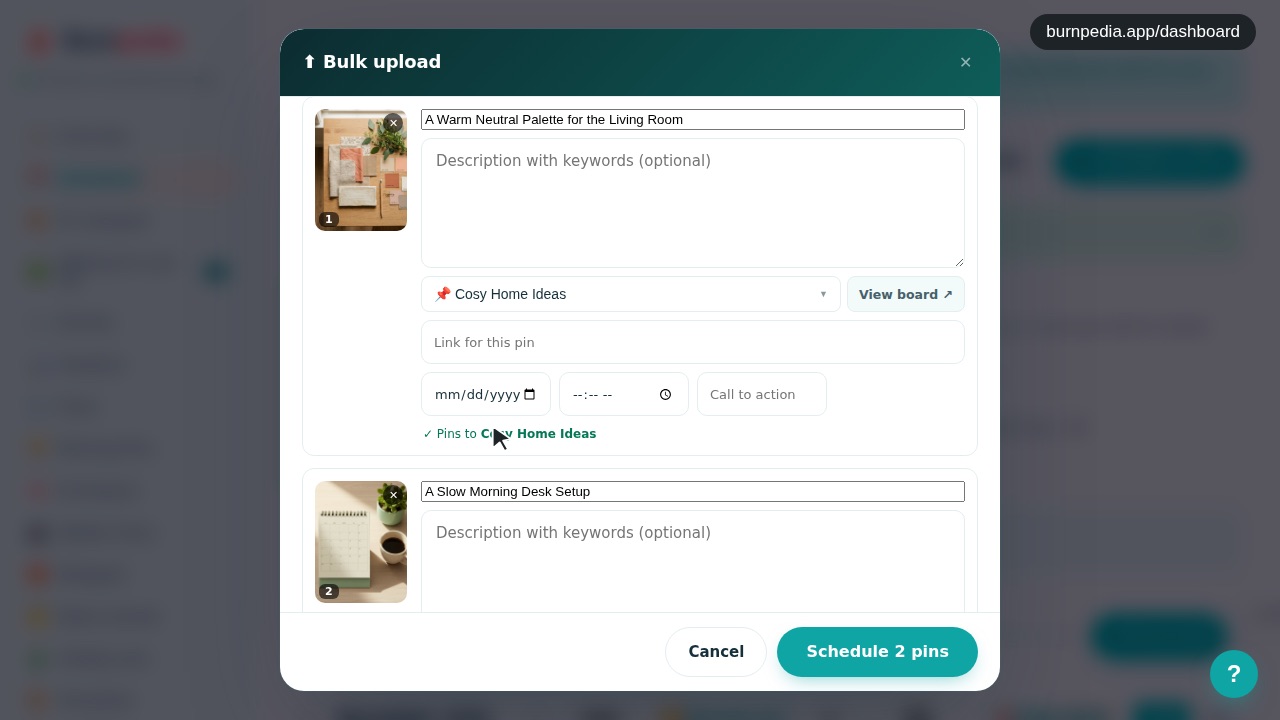
Press Bulk upload and add several pictures at once. Give each its own title and board, or pick one board and press Apply to all. Choose how to spread them out, over a month for example, add the link they should open, and press Schedule pins. More on this in how to bulk-schedule Pins.
Step 6: See what is scheduled and what is live
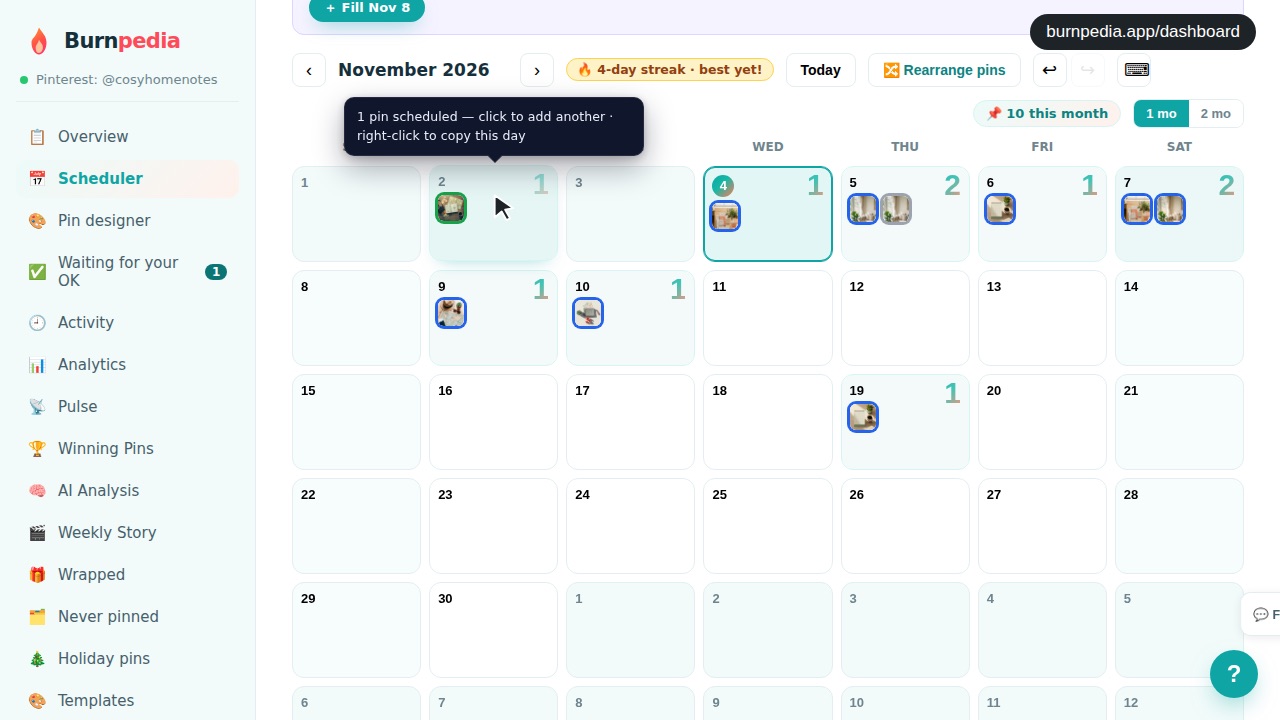
On the calendar, blue marks a scheduled Pin and green a published one. Under it, Upcoming lists what is still to come and History what went out. Activity lists everything that happened on your account, newest first, and Analytics shows impressions, saves and clicks, with your Winning Pins.
Step 7: For WordPress bloggers
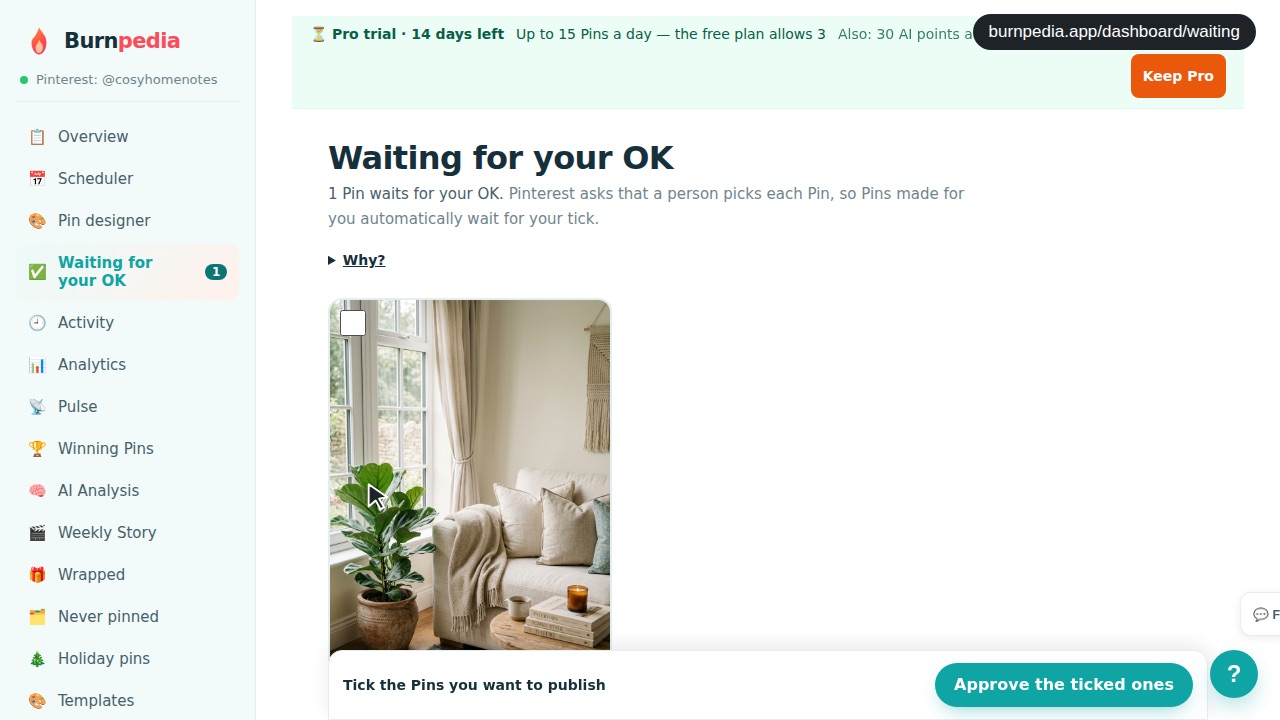
Blogging on WordPress? The free WordPress plugins turn each new post into a Pin draft. Drafts wait in Waiting for your OK, because Pinterest asks that a person picks each Pin. Tick the ones you want and press Approve; each is then scheduled. The whole setup is in Pin your WordPress posts.
Where to get help
Inside the app, the Help & how-to button in the menu opens a panel that explains each feature and takes you to it. The FAQ covers plans, points and scheduling, and you can always write to us.
Questions about this guide
Is there a step-by-step video?
Yes, the film at the top of this page. It has a voice and captions, and the chapter links under it jump to each step.
Do I need a card to follow along?
No. The Starter plan is free, never expires and needs no card.
Do I need a Pinterest business account?
A free business account is recommended: it unlocks analytics on Pinterest. A personal account can connect too.
Can I change a Pin after I schedule it?
Yes. Every scheduled Pin sits in Upcoming, where you can edit it or remove it up to its time. A wider tour is in the free Pinterest scheduler.
Want Pinterest to run itself?
Every tip on this blog gets easier when your Pins publish on schedule. Burnpedia batches, times, and posts them for you — start free, no credit card.
Try Burnpedia free